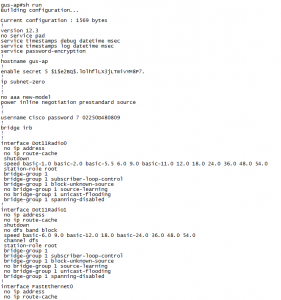
Standard

Configuring AIR-AP1131AG-E-K9 AP With WPA-PSK Authentication

GUS-AP#sh run
Building configuration...

Current configuration : 2820 bytes
!
version 12.3
no service pad
service timestamps debug datetime msec
service timestamps log datetime msec
service password-encryption
!
hostname GUS-AP
!
enable secret 5 $1$hAoq$XF1HCGURjTemj1M3J08bp0
!
ip subnet-zero
!
!
no aaa new-model
!
dot11 ssid AN1T2.4
vlan 1
authentication open
authentication key-management wpa
guest-mode
wpa-psk ascii 7 122E5419165B1B517B
!
dot11 ssid AN1T5
vlan 1
authentication open
authentication key-management wpa
guest-mode
wpa-psk ascii 7 122E5419165B1B517B
!
dot11 ssid SHADOW
vlan 2
authentication open
authentication key-management wpa
wpa-psk ascii 7 11584B5643475D5B5C73
!
power inline negotiation prestandard source
!
!
username gus privilege 15 secret 5 $1$GcRA$YPzeyFT3BLdPhQ7gGHP19/
!
bridge irb
!
!
interface Dot11Radio0
no ip address
no ip route-cache
!
encryption mode ciphers tkip
!
encryption vlan 1 mode ciphers tkip
!
encryption vlan 2 mode ciphers tkip
!
ssid AN1T2.4
!
ssid SHADOW
!
speed basic-1.0 basic-2.0 basic-5.5 6.0 9.0 basic-11.0 12.0 18.0 24.0 36.0 48.0 54.0
station-role root
no dot11 extension aironet
!
interface Dot11Radio0.1
encapsulation dot1Q 1 native
no ip route-cache
bridge-group 1
bridge-group 1 subscriber-loop-control
bridge-group 1 block-unknown-source
no bridge-group 1 source-learning
no bridge-group 1 unicast-flooding
bridge-group 1 spanning-disabled
!
interface Dot11Radio1
no ip address
no ip route-cache
!
encryption mode ciphers tkip
!
encryption vlan 1 mode ciphers tkip
!
encryption vlan 2 mode ciphers tkip
!
ssid AN1T5
!
ssid SHADOW
!
no dfs band block
speed basic-6.0 9.0 basic-12.0 18.0 basic-24.0 36.0 48.0 54.0
channel dfs
station-role root
no dot11 extension aironet
!
interface Dot11Radio1.1
encapsulation dot1Q 1
no ip route-cache
bridge-group 1
bridge-group 1 subscriber-loop-control
bridge-group 1 block-unknown-source
no bridge-group 1 source-learning
no bridge-group 1 unicast-flooding
bridge-group 1 spanning-disabled
!
interface Dot11Radio1.2
encapsulation dot1Q 2 native
no ip route-cache
bridge-group 1
bridge-group 1 subscriber-loop-control
bridge-group 1 block-unknown-source
no bridge-group 1 source-learning
no bridge-group 1 unicast-flooding
bridge-group 1 spanning-disabled
!
interface FastEthernet0
ip address 10.0.0.99 255.255.255.128
no ip route-cache
duplex auto
speed auto
bridge-group 1
no bridge-group 1 source-learning
bridge-group 1 spanning-disabled
hold-queue 160 in
!
interface BVI1
ip address 10.0.0.89 255.255.255.128
no ip route-cache
ip default-gateway 10.0.0.1
no ip http server
no ip http secure-server
ip http help-path http://www.cisco.com/warp/public/779/smbiz/prodconfig/help/eag
control-plane
bridge 1 route ip
line con 0
line vty 0 4
login local
!
end

GUS-AP#


The command to dissable the SSID broadcast from CLI is ” no guest-mode”

under the interface ssid .Perform these steps to disable SSID broadcast:


1.  AP(config)#interface dot11Radio X

2.  AP(config-if)#ssid

3.  AP(config-if-ssid)#no guest-mode
1130-WPA


more
Standard

LWAPP to Autonomous Conversion Cisco AIR-AP1131AG-E-K9

Quick steps to get Autonomous Conversion on Cisco AIR-AP1131AG-E-K9
1.RESET

power off ap, push and hold mode button, plug in power, wait ~30sec. Ap is reset; secret is Cisco.

2.LOAD NEW ARCHIVE

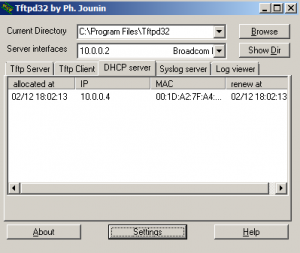
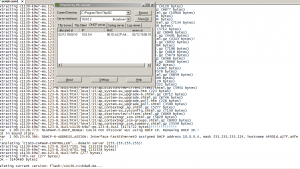
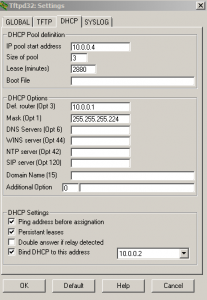
TFTP sever and dhcp conf:
TFTP_DHCP


2-dhcp

after you will get an ip address via dhcp (i got 10.0.0.4)you need to run:
#debug capwap console cli

###You can set an ip address manually:

gus-ap#conf t
Enter configuration commands, one per line.  End with CNTL/Z.
gus-ap(config)#interface fastEthernet0
gus-ap(config-if)#ip address 10.0.0.5 255.255.255.224
gus-ap(config-if)#no sh
gus-ap(config-if)#do ping 10.0.0.2

Type escape sequence to abort.
Sending 5, 100-byte ICMP Echos to 10.0.0.2, timeout is 2 seconds:
!!!!!
Success rate is 100 percent (5/5), round-trip min/avg/max = 1/1/2 ms
gus-ap(config-if)#

#archive download-sw /force-reload /overwrite tftp://10.0.0.2/c1130-k9w7-tar.123-8.JEA3.tar

1

sh_runDone…


Autonomous archive download:

c1130-k9w7-tar.123-8.JEA3

more
Standard

Cisco Unified Contact Center Express OS Administration Password Reset

Recovering the Administrator Password

If you lose the Administrator password and cannot access the system, you can reset the Administrator password.

Before You Begin

•During this procedure, you will be required to remove and then insert a valid CD or DVD in the disk drive to prove that you have physical access to the system.

•The Administrator signin must start with an alphabetic character, be at least six characters long, and can contain alphanumeric characters, hyphens, and underscores.

Procedure

Step 1 Sign in to the system with the following username and password:

•Username: pwrecovery

•Password: pwreset

Step 2 Press any key to continue.

Step 3 If you have a CD or DVD in the disk drive, remove it now.

Step 4 Press any key to continue.

The system tests to ensure that you have removed the CD or DVD from the disk drive.

Step 5 Insert a valid CD or DVD into the disk drive.

Step 6 After the system verifies that you have inserted the disk, you are prompted to enter a new Administrator password.

Step 7 Reenter the new password.

Step 8 After the system verifies the strength of the new password, the password is reset, and you are prompted to press any key to exit the password reset utility.

Troubleshooting Tips

•If you want to set up a different Administrator password, use the CLI command set password.

•The system checks the new password that you enter for strength. If the password does not contain enough different characters, you are prompted to enter a new password.

Related Topics

Command Line Interface Reference Guide for Cisco Unified Presence (on Cisco.com)

Creating a Customized Log-on Message

You can upload a text file that contains a customized log-on message that appears in each of the Cisco Unified Presence applications administrative interfaces.

Procedure

Step 1 Sign in to Cisco Unified Communications Operating System Administration.

Step 2 Select Software Upgrades > Customized Logon Message.

Step 3 Select Browse to select the text file you want to upload.

more